Employee Management on Mi9
After successfully creating work groups, the next step is to create and manage employee accounts to begin assigning tasks and operating the system efficiently.
The Employee Management feature on Mi9 allows businesses to:
- Create employee accounts quickly
- Assign employees to the appropriate work groups
- Configure detailed permissions by Zalo channel – conversation tag – data scope
- Maintain strict control over customer data from the start
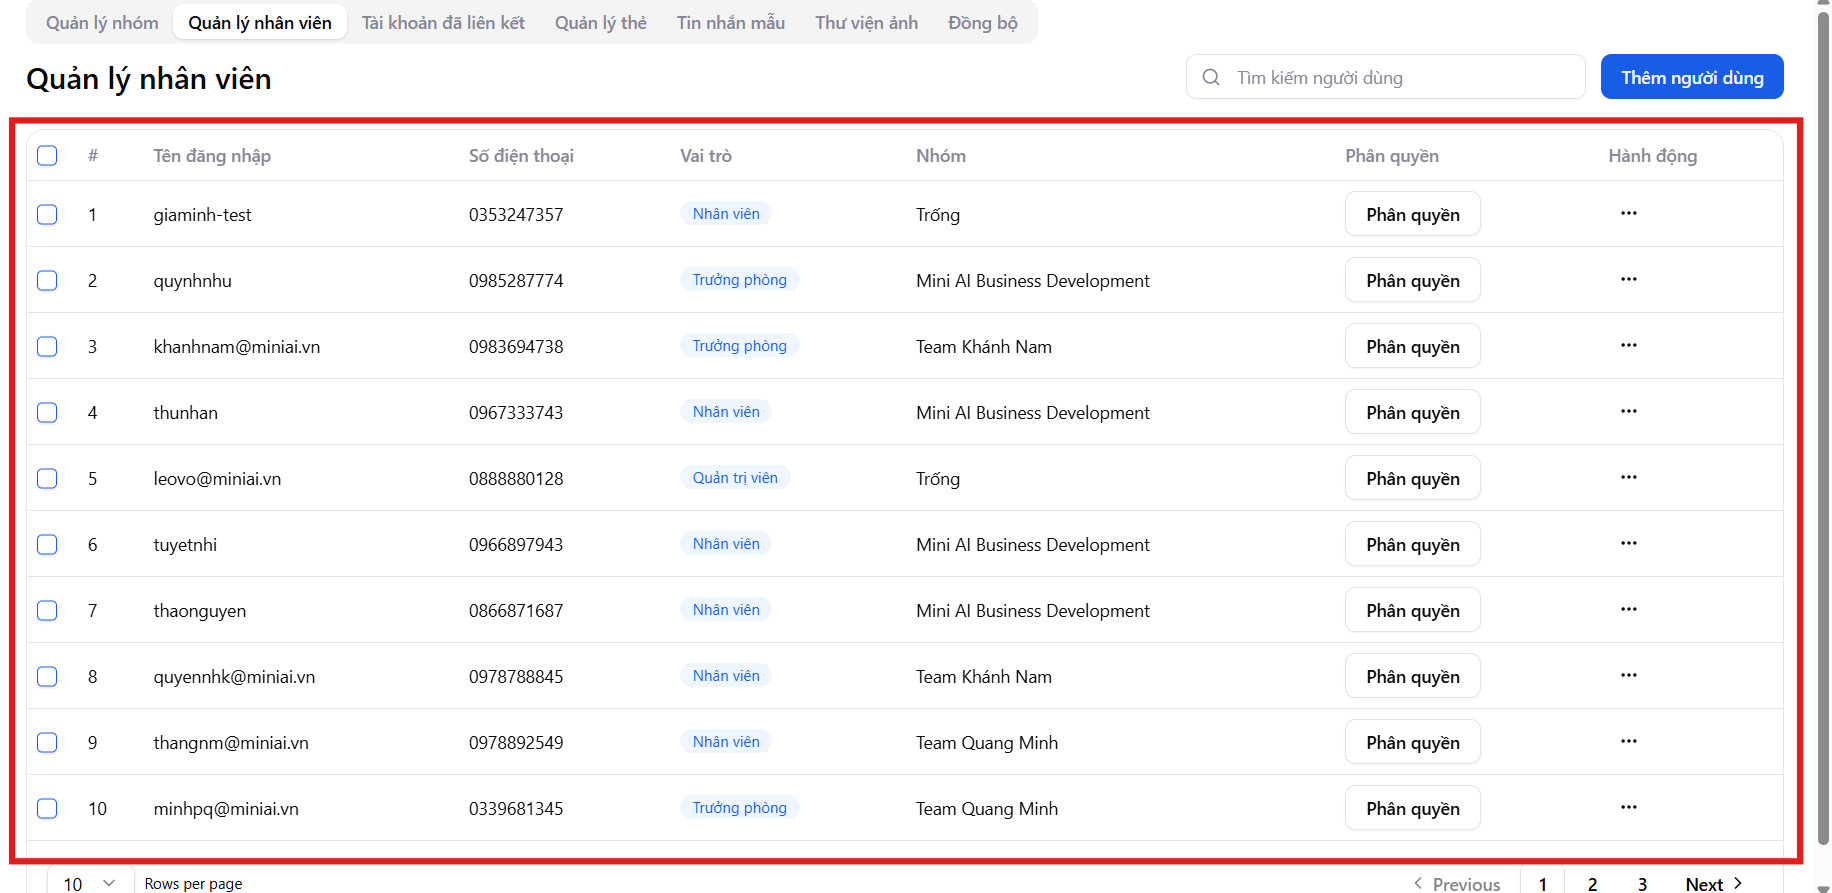
Employee management interface
The Employee Management screen displays a list of all active accounts on the system with the following information:
- Login name
- Phone number
- Role (Staff / Team Leader / Administrator)
- Work group
- Permissions
- Actions (edit, change password, delete)
Additionally, users can quickly search for employees and add new users directly from the top-right corner of the screen.
Steps to create employee groups on Mi9
Step 1: Add a new user
To create an account for a new employee, click "Add User" in the top-right corner of the screen.
The system will display the Add New User form, allowing you to:
- Create a login account for the employee
- Assign the employee to an appropriate work group
This process helps the business set up the team quickly and with the right roles, ensuring each employee joining Mi9 has a clear scope of work.
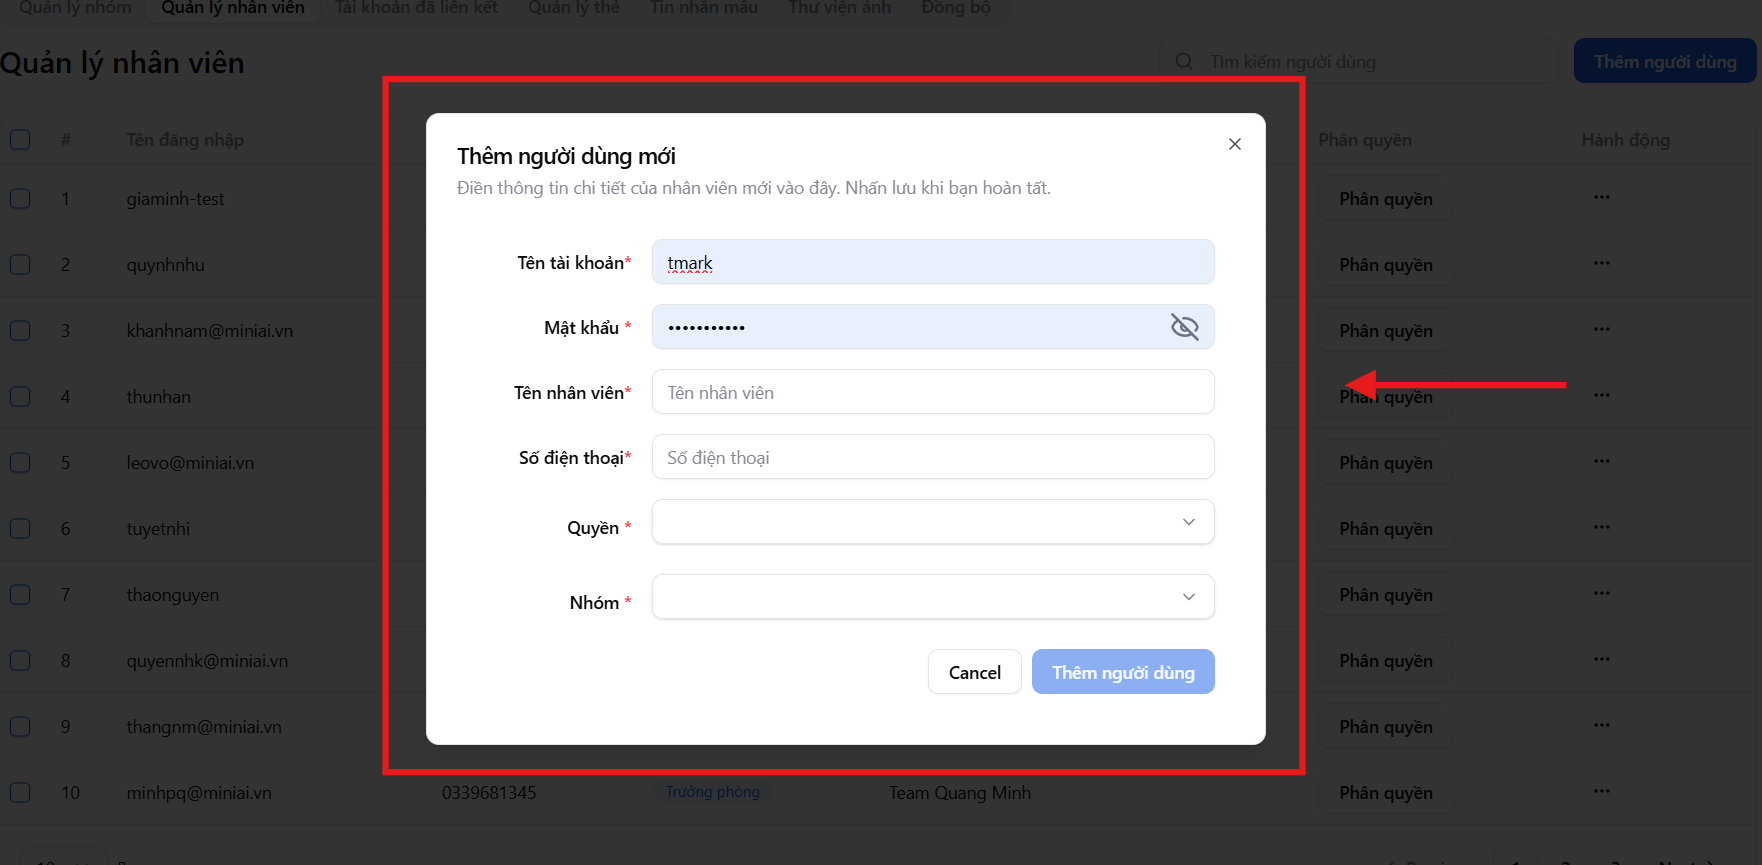
Information required when creating an employee account
Users need to fill in the following information:
1. Account Name *
Used by the employee to log in to the Mi9 system.
It is recommended to follow internal naming conventions (e.g., name + department) for easy management.
2. Password *
Login password for the employee account.
Employees may be required to change their password after the first login to enhance security.
3. Employee Name *
The employee's display name in the system, used for:
- Conversation assignment
- Work performance tracking
- Reports and statistics
4. Zalo Phone Number *
The Zalo phone number used for logging in and working on the system, serving:
- Internal verification
- HR management
- Reconciliation when needed
5. Permission *
Determines the role and scope of operations for the employee in the system, including:
- Staff
- Team Leader
- Administrator
Each role corresponds to different features and access permissions.
6. Group *
Assign the employee to a work group that was previously created, allowing the system to automatically route conversations and customers.
Once completed, click "Add User" to create the account.
The employee account will be created immediately and ready to participate in operations on Mi9.
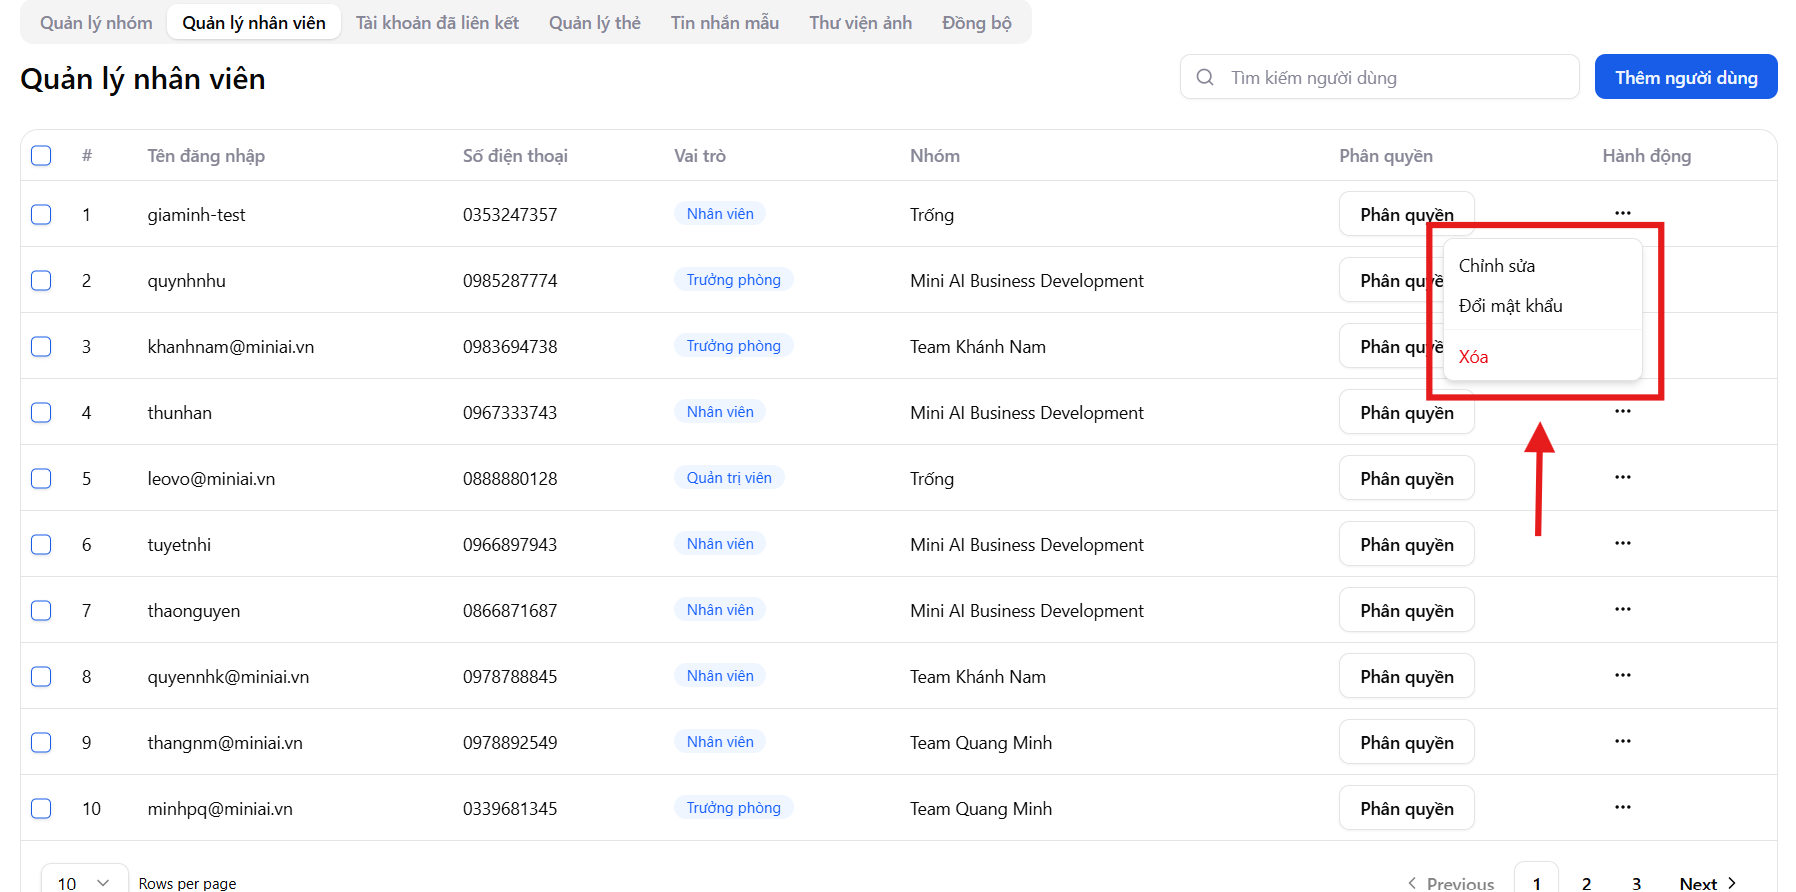
Step 2: Manage and operate from the employee list
In the employee list, users can:
- Quickly view roles and work groups
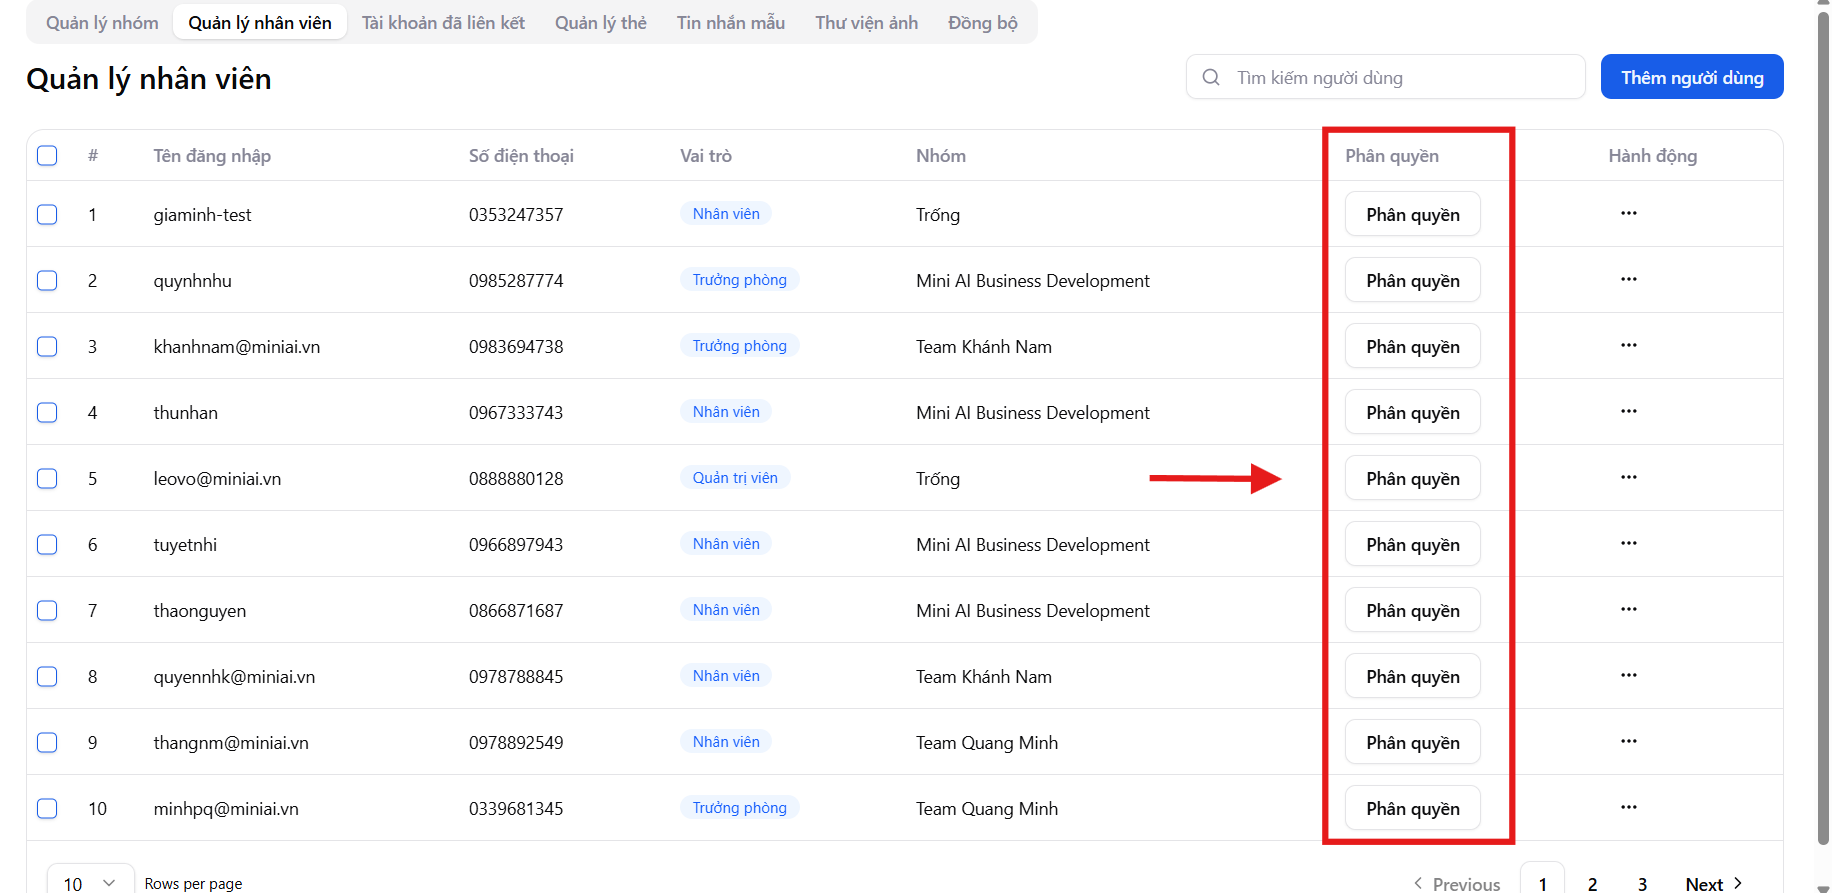
- Click "Permissions" to configure detailed permissions
- Click the "..." icon to:
- Edit information
- Change password
- Delete employee account
Step 3: Configure employee account permissions
After successfully creating the account, the next important step is to set up permissions to clearly define:
- What the employee is allowed to do
- Which data they can view
- Which Zalo channels they manage
On the Account Permissions screen, users can configure detailed settings for each personal Zalo channel.
Permission configuration options
1. Permissions by conversation tag
- Specify which customer tags the employee is allowed to view and handle (Potential, Interested, Signed, Contract Processing, Referral...)
- Supports select all or individual tag selection
- Ensures the employee only works on the assigned customer segment
2. Permission to view untagged conversations
- Allow or disallow employees to view conversations that have not been categorized
- Helps control new leads, especially important for team leaders and administrators
3. Phone number display permission
- Allow showing or hiding customer phone numbers
- Helps businesses protect customer data and prevent information leaks
4. Permissions by channel / Zalo account
- Specify which personal Zalo accounts the employee is allowed to manage
- Permissions can be set for multiple different channels depending on the role
- Ensures the employee only accesses and operates on assigned channels
5. Admin permissions (for admin accounts) For admin accounts, users can grant additional permissions:
- Manage employees and permissions
- Manage work groups
- Monitor and control all conversations in the system
Benefits of detailed permissions on Mi9
Mi9's permission mechanism helps businesses:
- Strict data control
- Clear and transparent task assignment
- Safe operations even when scaling the team
Mi9 ensures the right person – the right data – the right role, keeping the system running efficiently with maximum security.