Getting Started with Mi9 SCRM
To get started with Mi9 SCRM, your business only needs to complete a few basic setup steps. These steps prepare the system to manage customer conversations, assign employee permissions, and operate customer care efficiently.
The setup process takes only about 3 – 5 minutes.
1. Setup overview
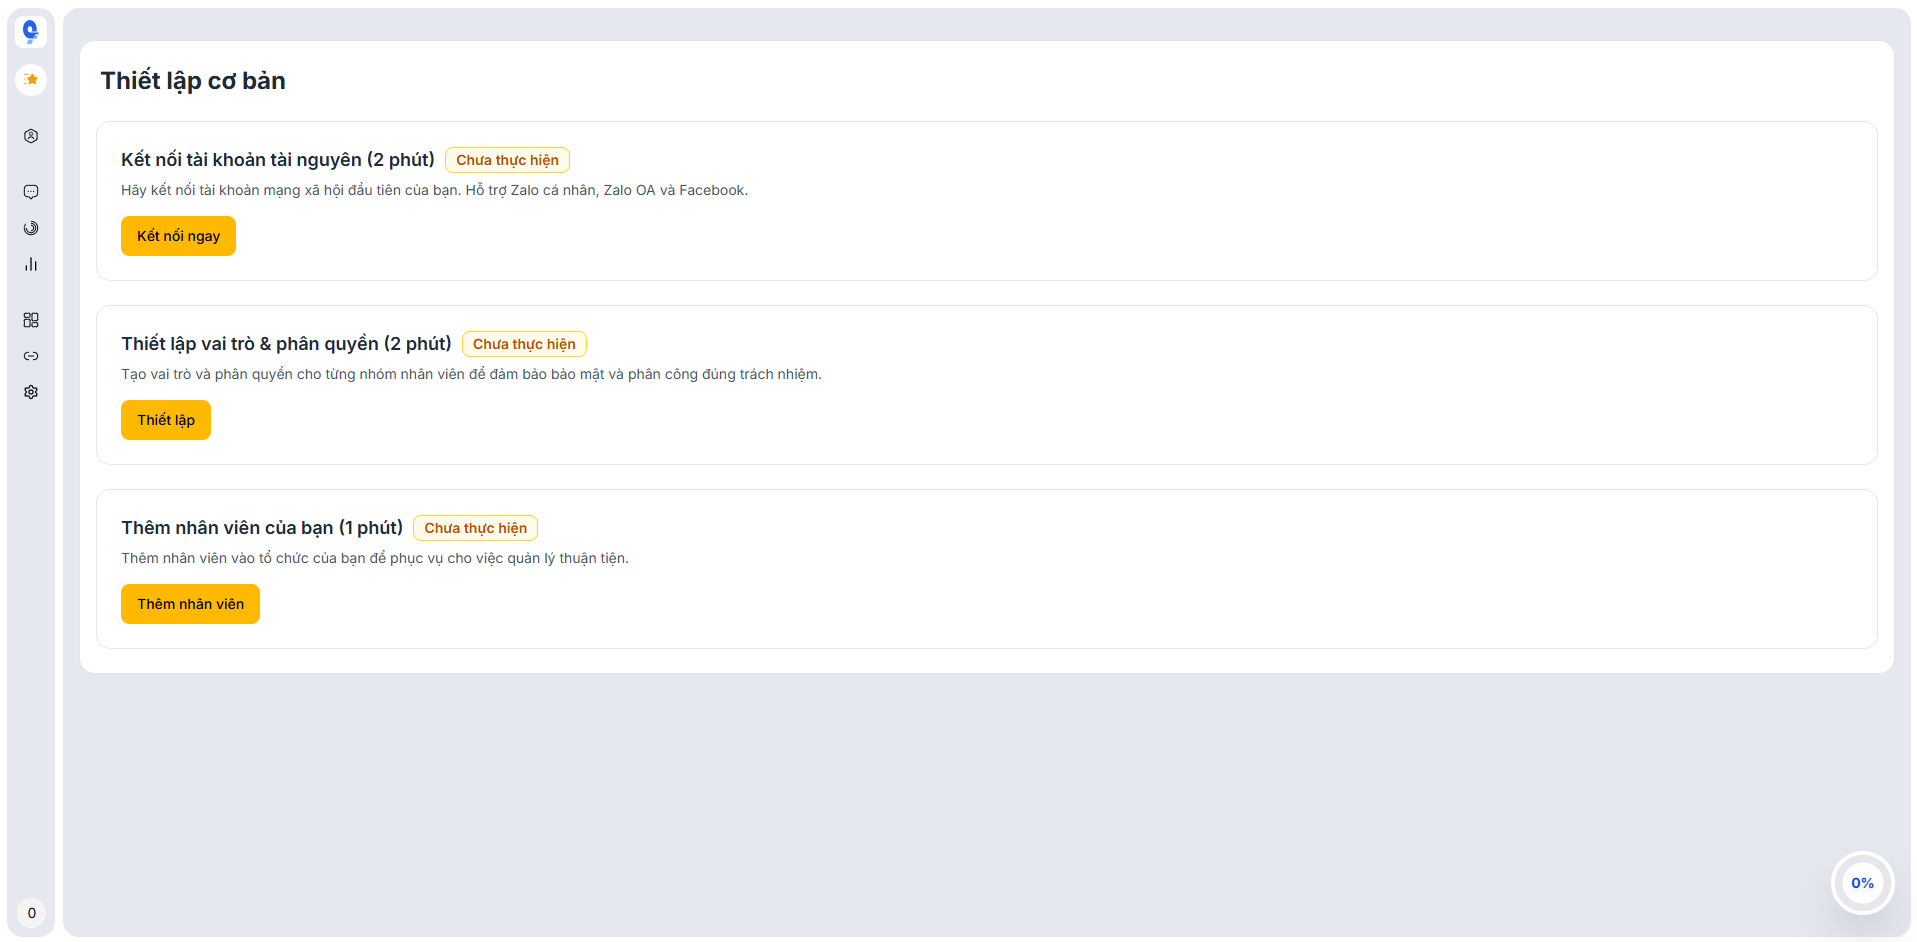
Hình ảnh: Basic setup screen
When you log in to the system for the first time, you will see the Basic Setup screen with the following steps:
- Connect resource accounts
- Set up roles & permissions
- Add employees to the system
After completing these steps, you can start managing conversations and caring for customers immediately.
2. Connect resource accounts
Hình ảnh: Connect resource accounts
2.1. Purpose
This step allows the system to link customer communication channels to Mi9 SCRM.
After connecting, all messages from the channels will be synced to a single location, making it easy for the business to manage and respond to customers.
2.2. Supported platforms
Mi9 SCRM currently supports connecting the following platforms:
- Personal Zalo
- Zalo Official Account (Zalo OA)
- Facebook Page
2.3. How to do it
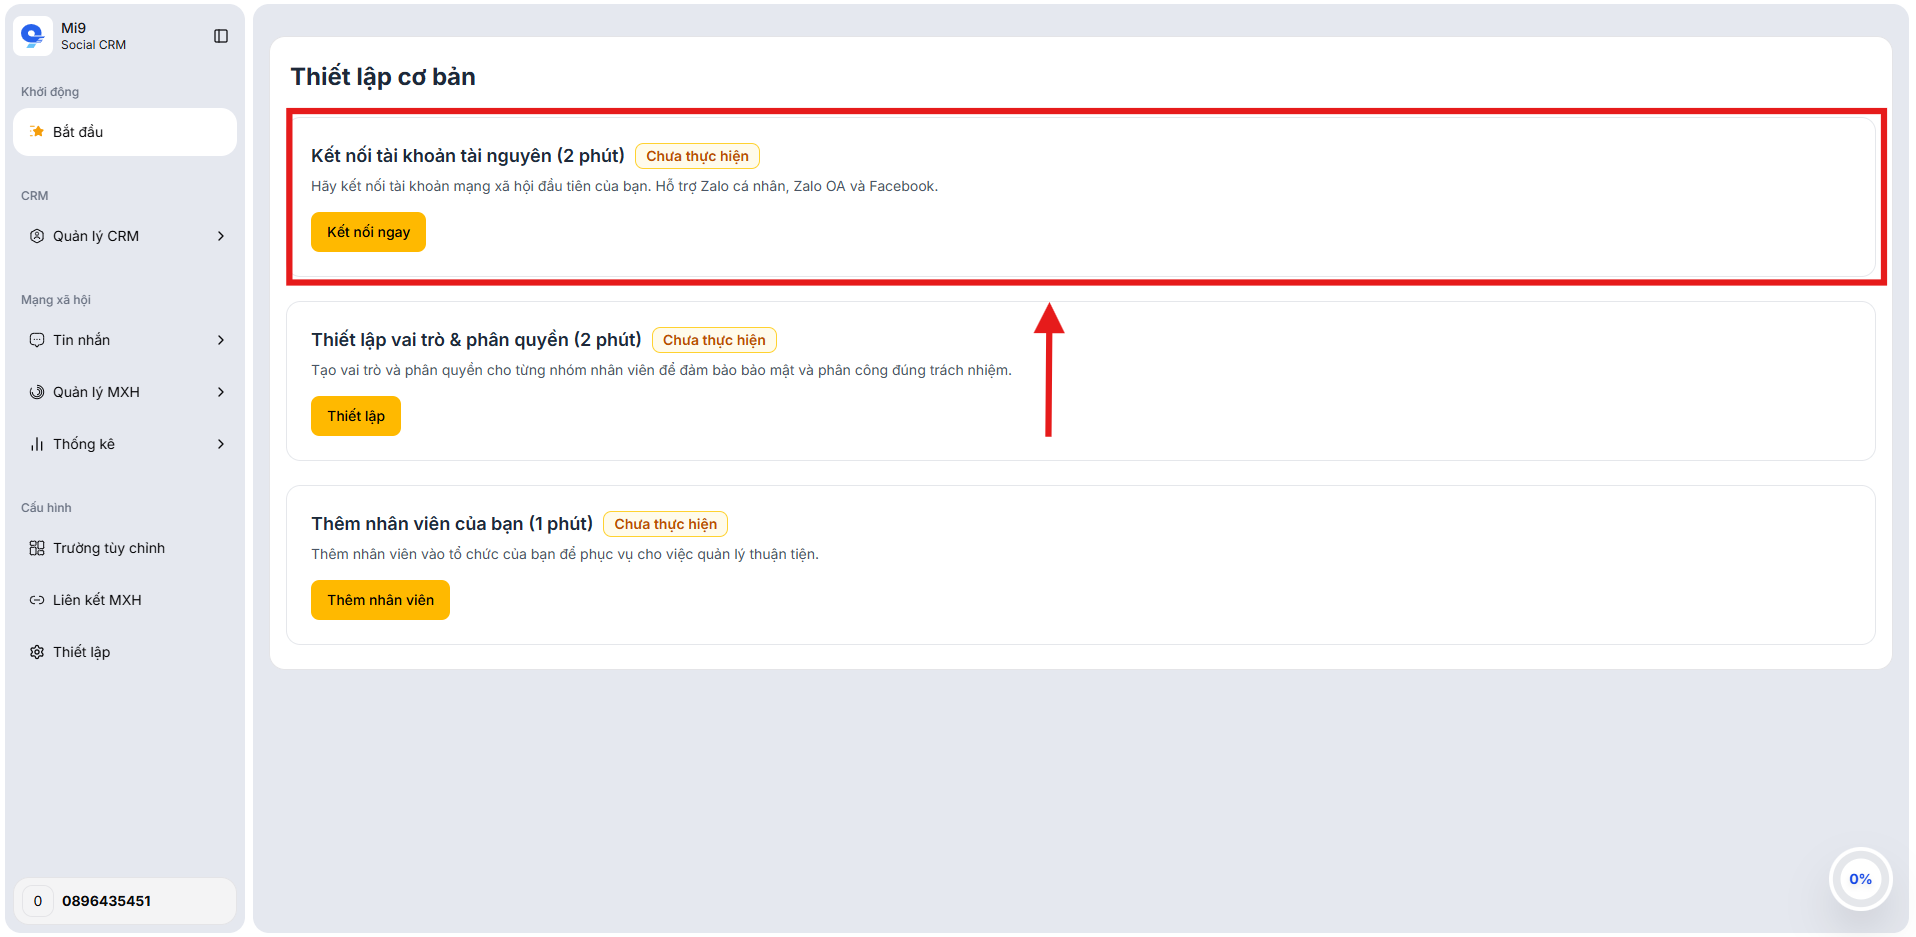
Step 1: On the Basic Setup screen, select Connect Now
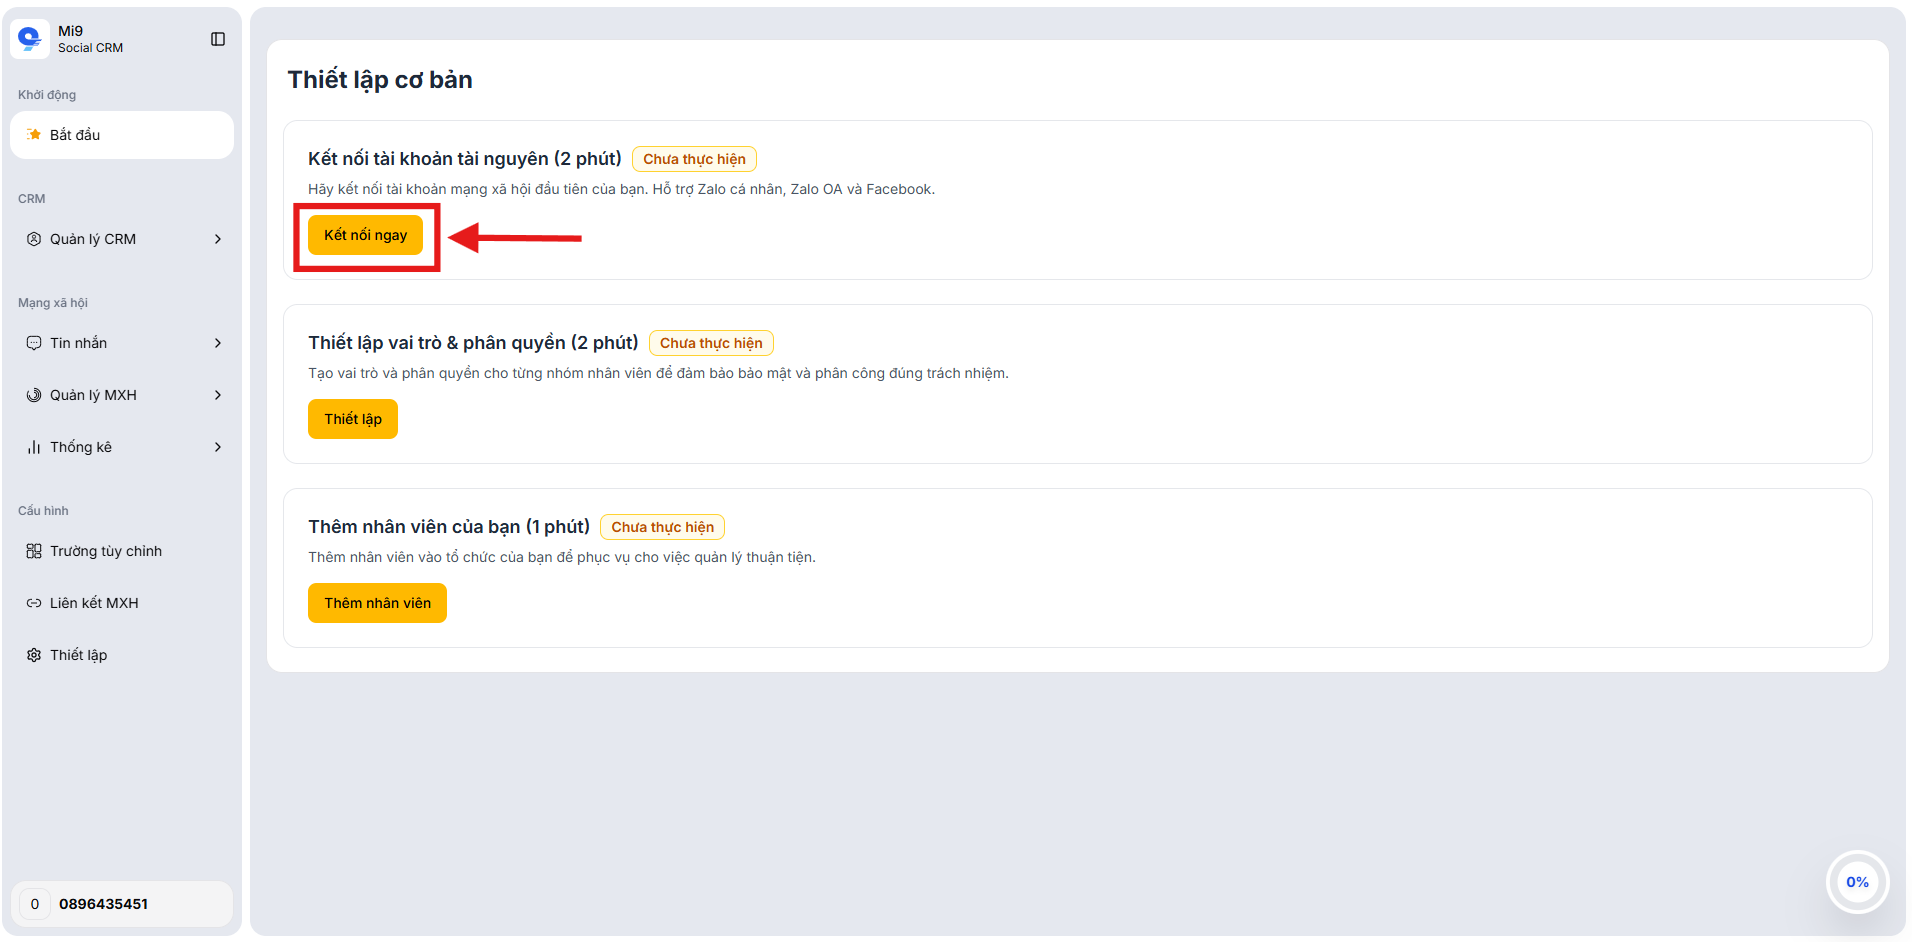
Hình ảnh: Step 1: Select Connect Now
After selecting, the system will navigate to the list of connectable platforms page.
Step 2: Click link new account and select the platform to connect
Here, you select the platform your business uses to communicate with customers (e.g., Zalo OA, Personal Zalo, Facebook Page).
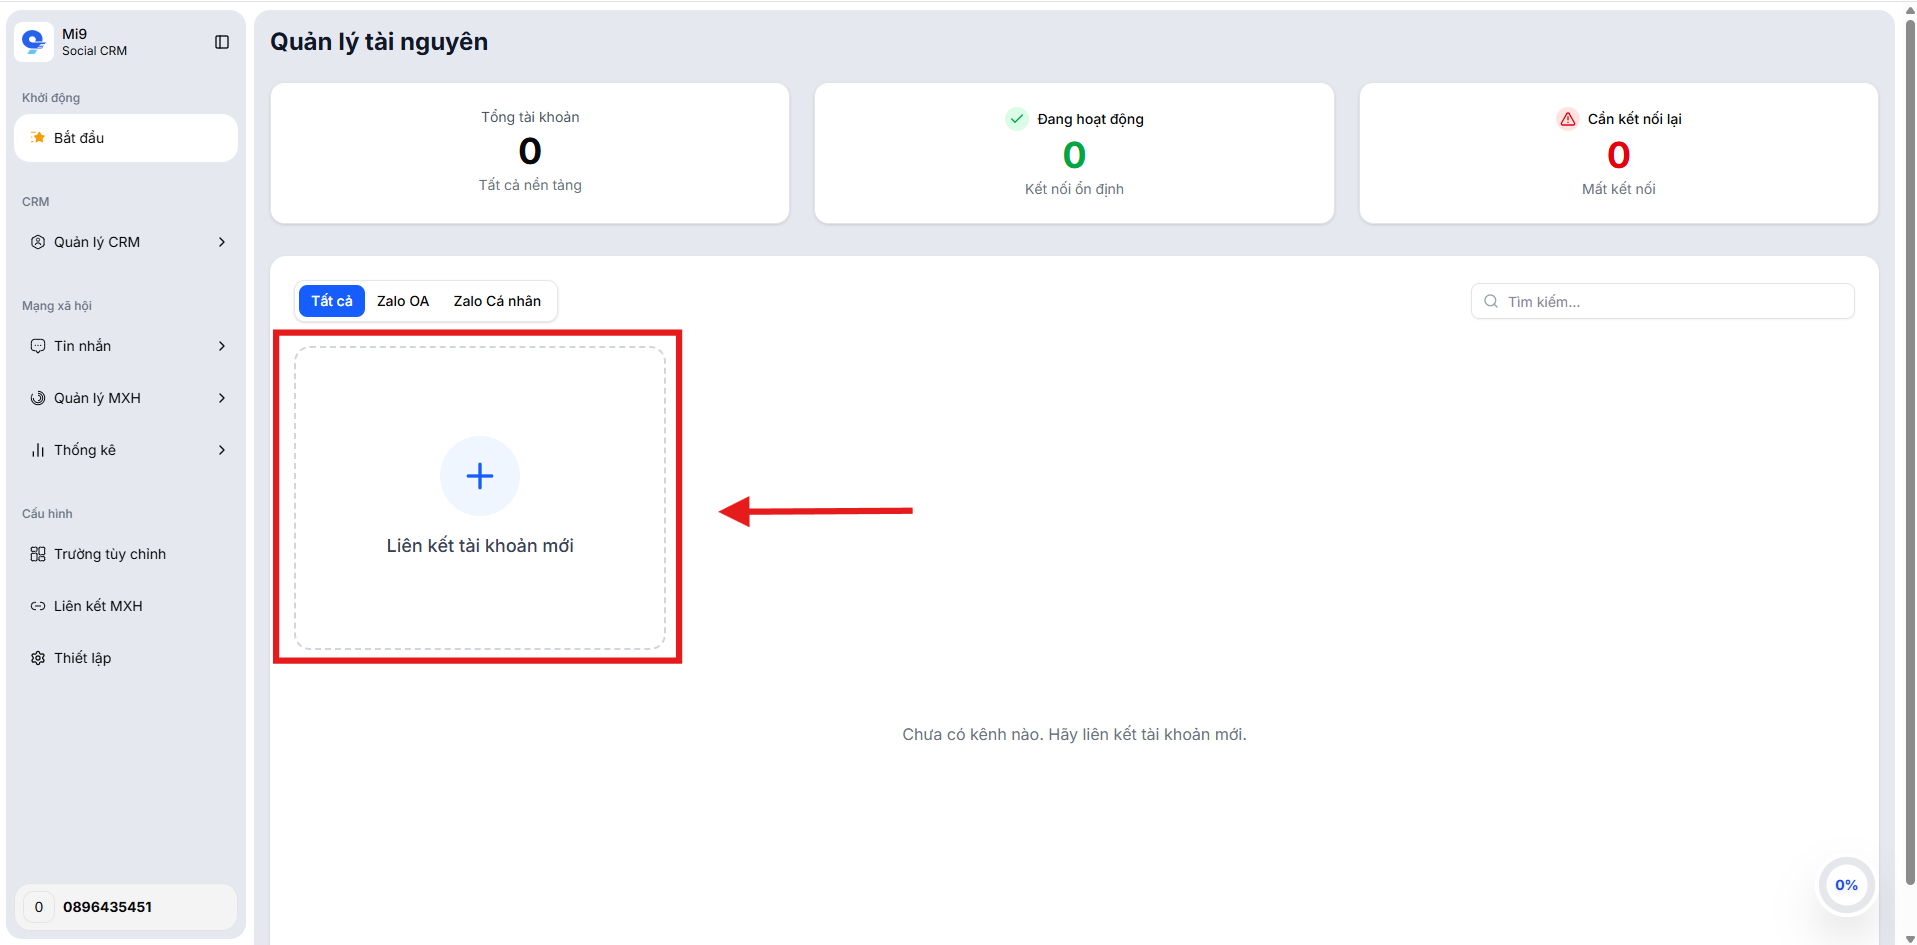
Hình ảnh: Link account
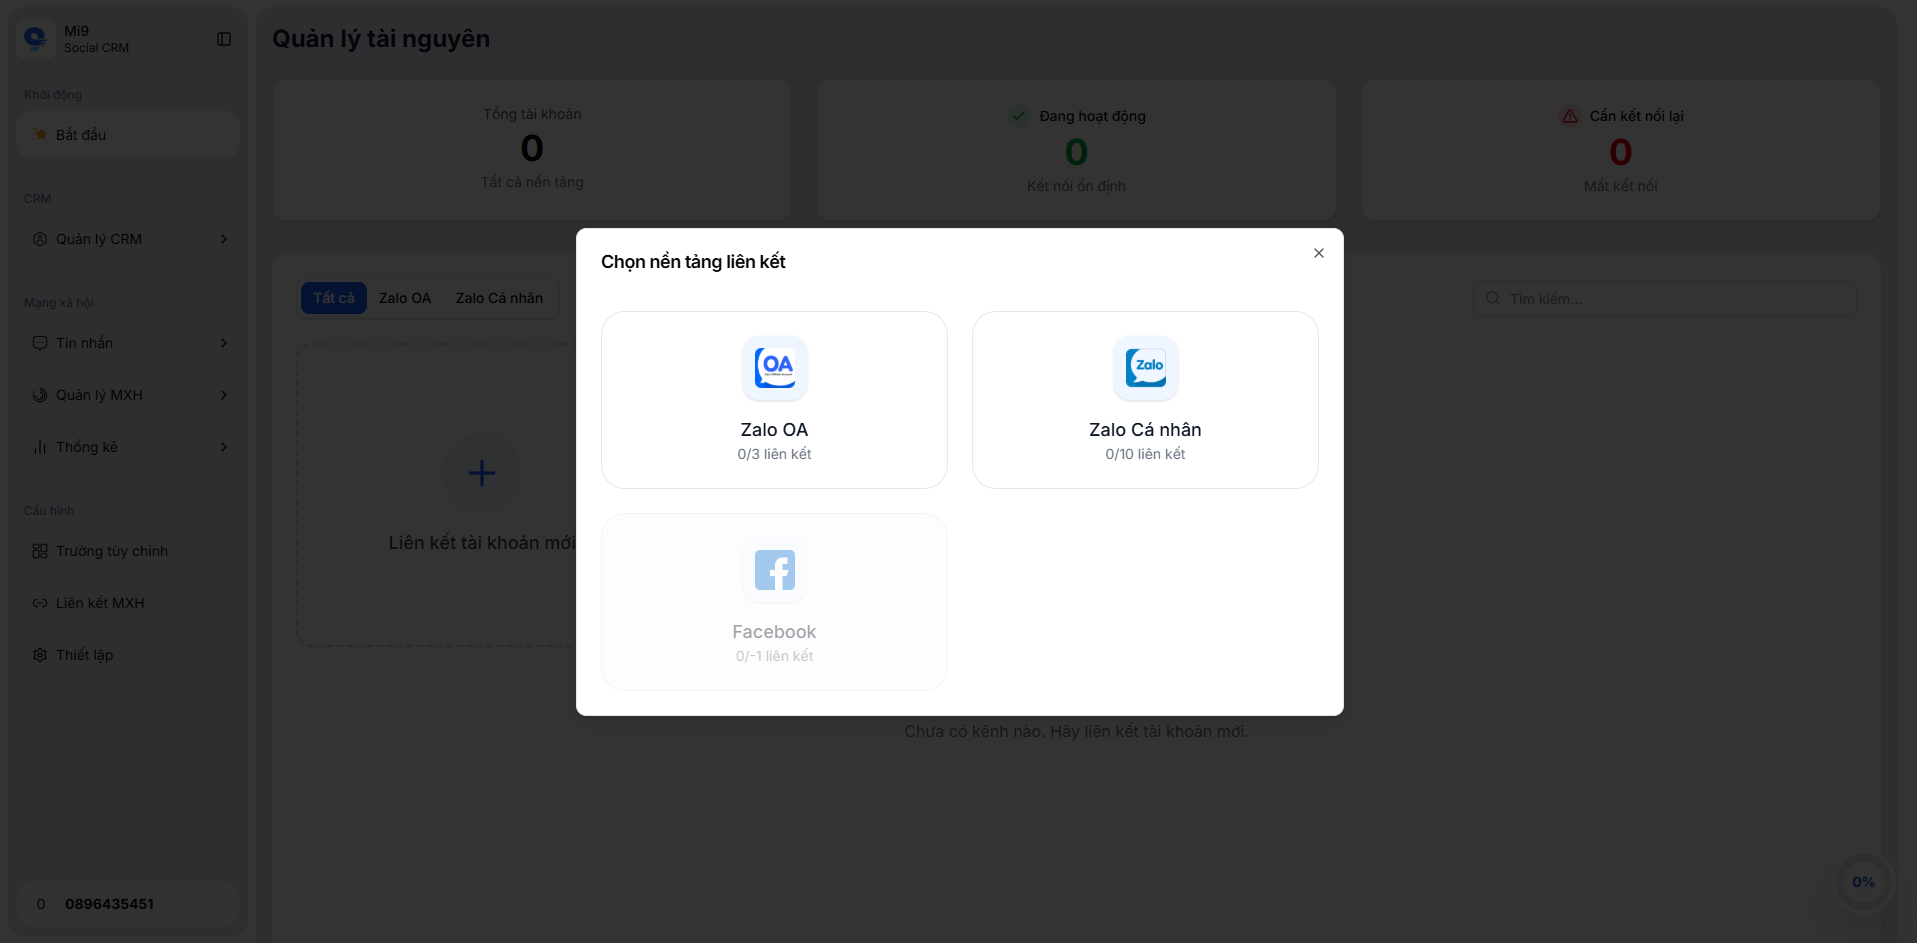
Hình ảnh: Select platform to link
After selecting the platform, the system will guide you to log in and grant permissions so Mi9 SCRM can sync data.
After successful connection, the system will begin:
- Syncing messages from connected channels
- Posting articles, videos, images to connected channels (if applicable)
- Managing comments, reviews on connected channels
- Tracking performance statistics on connected channels
2. Set up roles & permissions
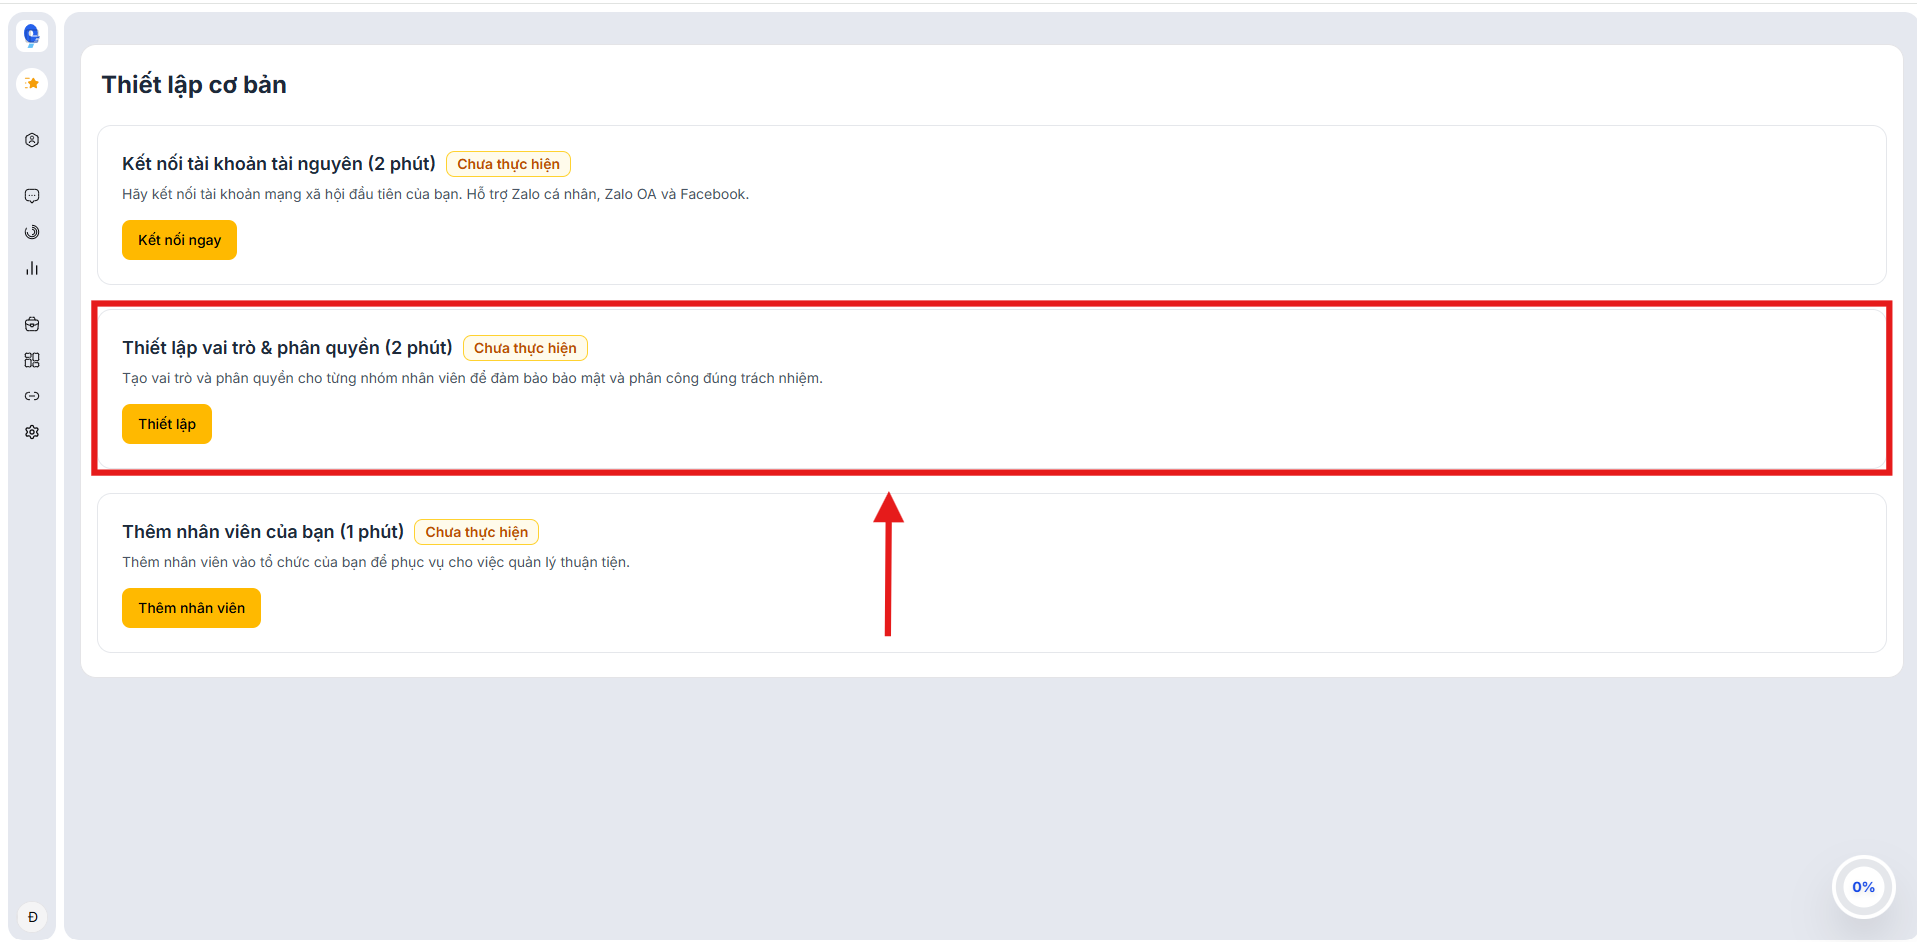
Hình ảnh: Set up roles & permissions
2.1. Purpose
The roles & permissions feature helps businesses:
- Assign access permissions for each employee
- Secure customer data
- Assign the right responsibilities to each department
For example:
| Role | Permission |
|---|---|
| Admin | Manage the entire system |
| Manager | Manage employees and conversations |
| Staff | Customer care |
2.2. How to set up
1. Go to the Roles & Permissions section
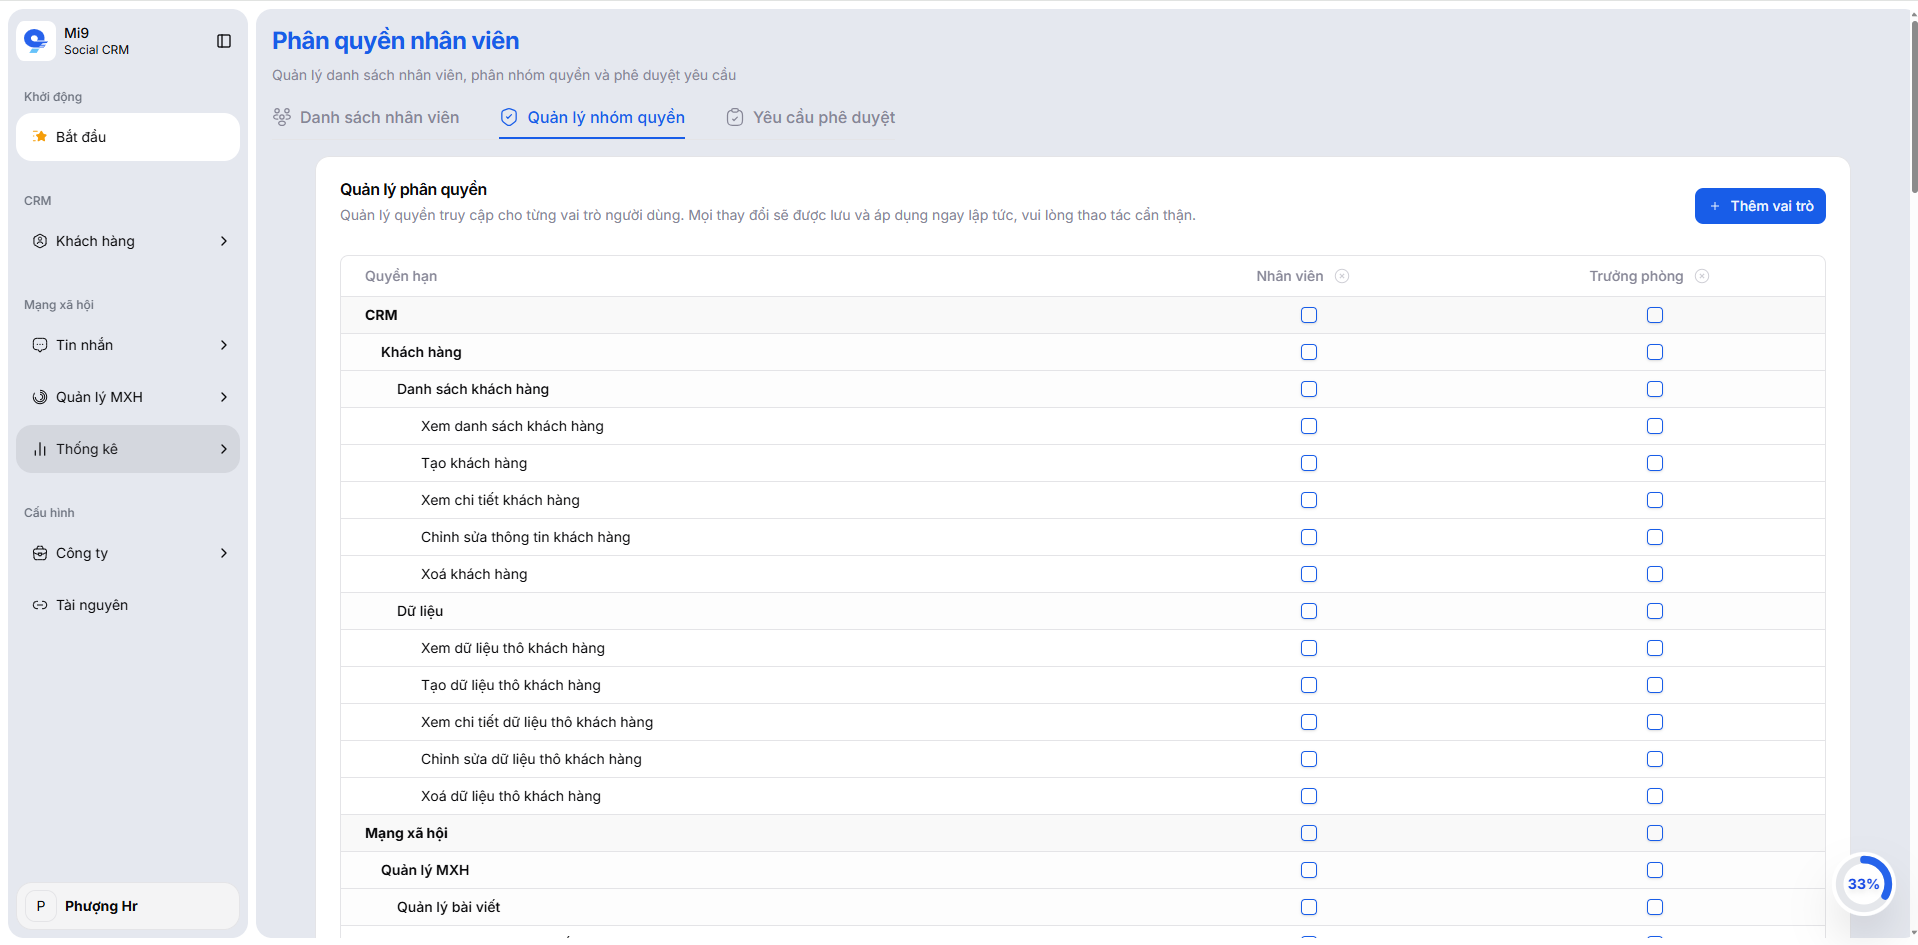
Hình ảnh: Roles & Permissions setup
Here you will see default roles and permission groups configured by the system. You can use them directly or customize them for your business needs.
2. Create a new role or edit a default role

Hình ảnh: Create or edit roles
You can create additional roles and modify the permission settings to fit your organizational structure. Remove any roles that are not relevant to your workflow.
3. Save your role and permission configuration
After configuring role permissions, save the changes so they take effect. Once the setup is complete, you can assign roles to employees in the next step.
3. Add employees to the system
You have connected resources and set up role permissions. Now it’s time to add the people who will operate the system.
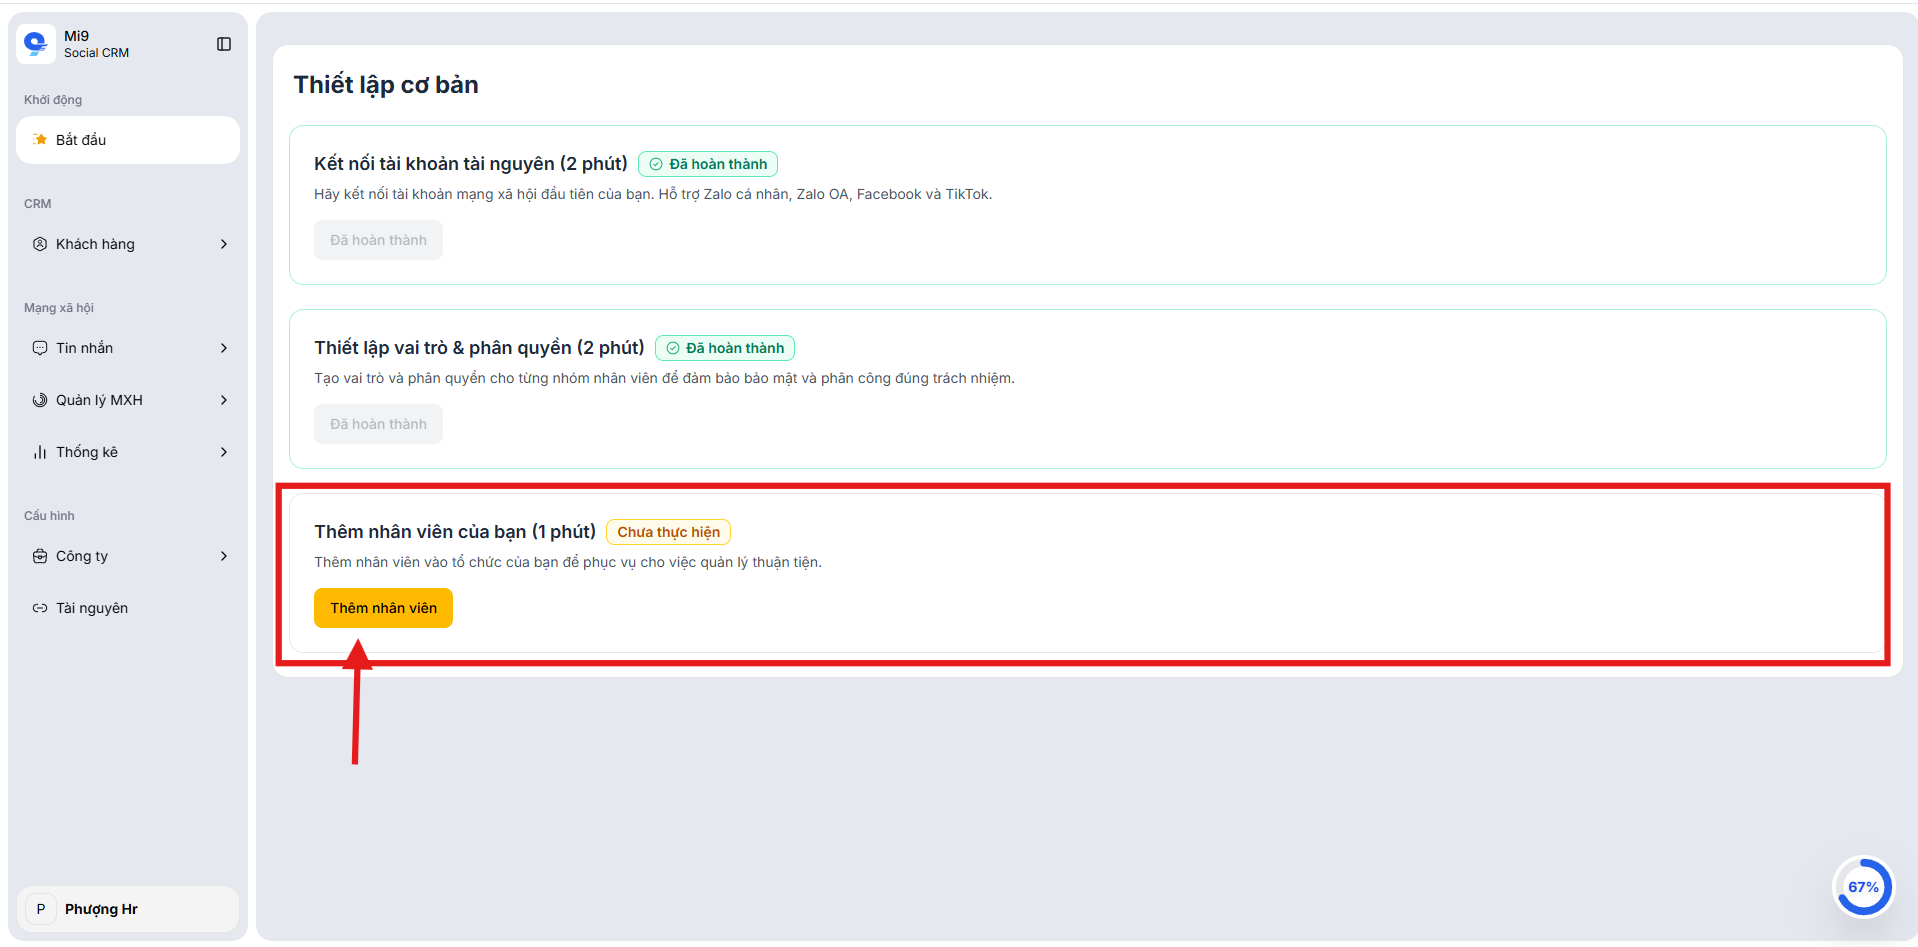
Hình ảnh: Add employees
3.1. Purpose
This feature allows you to add team members to the Mi9 SCRM system to collaboratively manage customer care.
Each employee can be assigned:
- Role
- Access permissions
- Conversation management scope
3.2. How to add employees
1. Select Add Employee
You will be taken to the employee management page, where the existing staff list is displayed (if available) and the add new employee controls are provided.
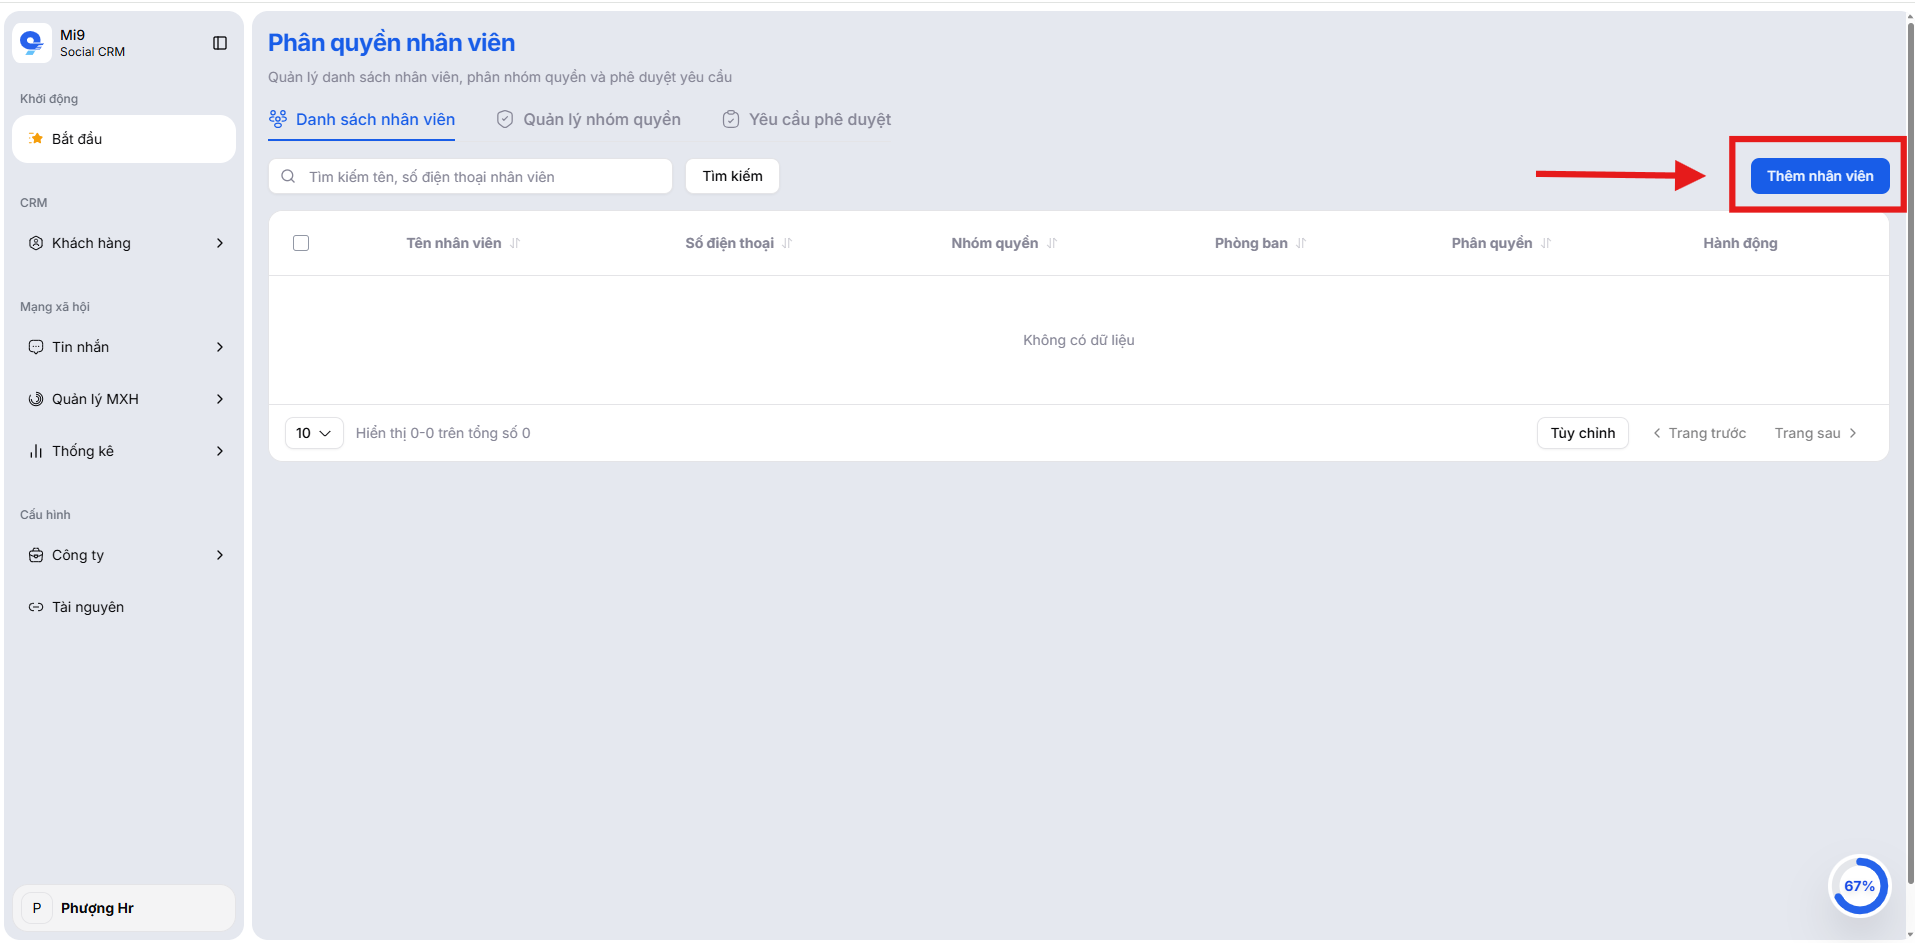
Hình ảnh: Employee management
Click the Add Employee button on the right to begin.
2. Choose an employee onboarding method
You can choose:
- Manual entry: input each employee’s information one by one.
- Bulk onboarding: generate an invitation link or QR code for employees to self-register.
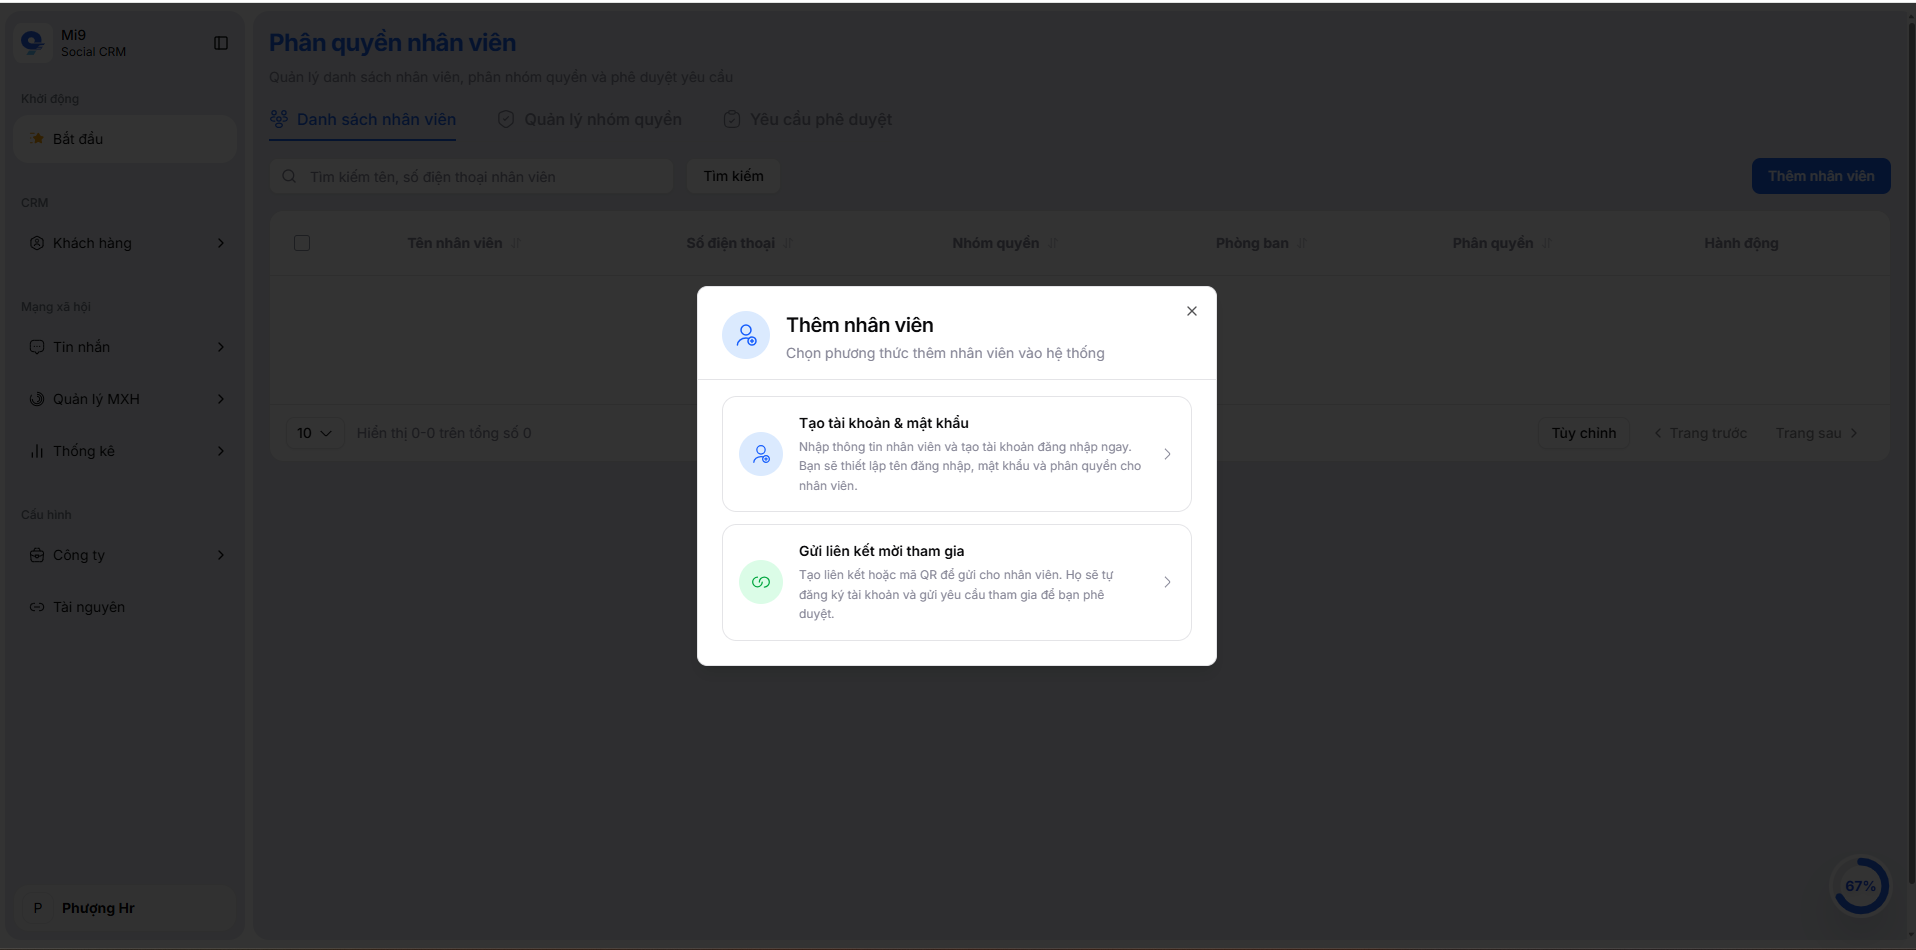
Hình ảnh: Employee onboarding options
For manual account creation, collect the following information:
| Field | Description |
|---|---|
| Employee name | Full name of employee |
| Username | Login username |
| Phone number | Contact phone number |
| Role group | Assigned permission group (e.g., Staff, Manager, Admin) |
| Department | Department (optional) |
| Password | System-generated password |
Copy the password and provide it to the employee for first login.
Click Create Account to finalize.
3. Bulk employee onboarding (optional)
- Select the role group for the batch (e.g., Staff, Manager, Admin)
- The system provides a link or QR code for employees to self-register with predefined permissions.
Share this link or QR code with your staff for fast onboarding of many employees at once.
After adding employees, the list view shows the newly added profiles with basic details like name, phone, role group, and department. You can edit or remove employees as needed.
Setup complete
After completing the 3 setup steps, the system is ready to use.
You can start:
- Managing customer conversations
- Assigning customer care staff
- Tracking response performance
Next steps
Continue exploring Mi9 SCRM features:
- Conversation management
- Customer management
- Campaign management
- Reports & statistics
We have prepared detailed guides for each Mi9 SCRM feature to help you get the most out of the platform for customer care and business growth. Enjoy a great experience with Mi9 SCRM!